Documentation
Start a Server
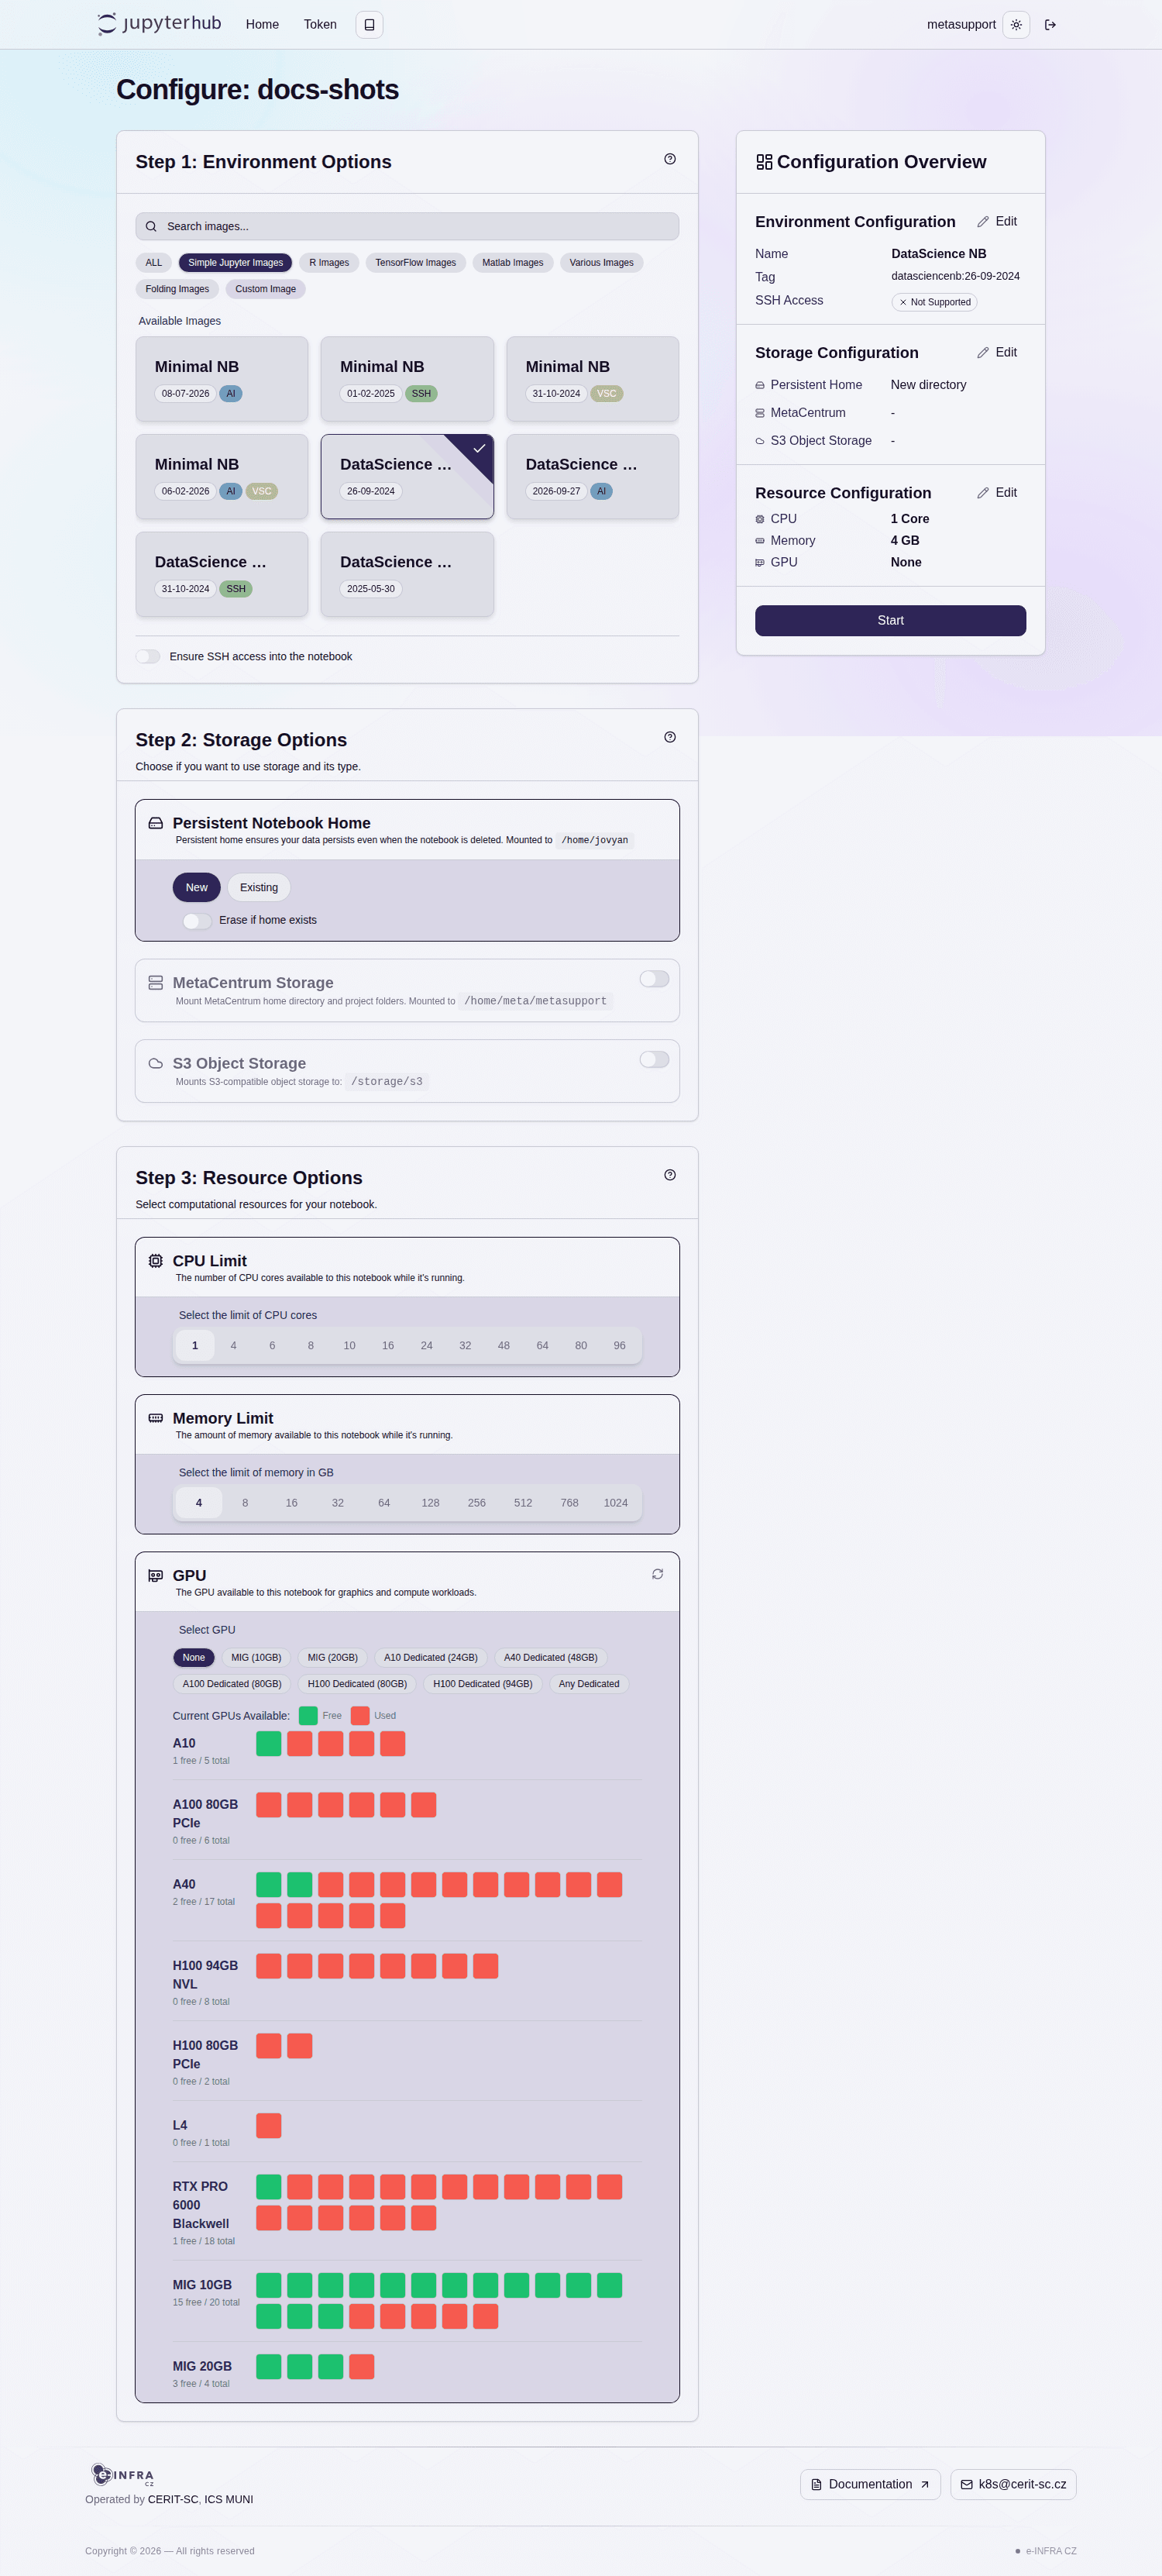
When you spawn a new JupyterHub server, you configure three components: the software image (your working environment), storage (where your files live), and hardware resources (CPU, RAM, GPU). This page walks through each choice.
Choose Your Image
Select a pre-configured environment tailored to your scientific domain:
| Category | Image Options | Best For |
|---|---|---|
| AI-Enhanced Python / Data Science | Minimal NB (AI), DataScience NB (AI) | General data analysis, Python coding with built-in Jupyter AI chat and Claude Code agentic assistant. |
| Statistical Computing (R) | RStudio (4.5.2 AI, 4.6.1 AI), Python and R kernels | R programming with Posit Assistant or Claude Code integration. |
| Machine & Deep Learning | TensorFlow, PyTorch, NVIDIA PyTorch/TensorFlow (look for GPU tags) | Training neural networks and GPU-accelerated calculations. |
| Structural Biology | Colabfold, ESM Fold | Protein structure prediction and bioinformatics. |
| Engineering & Math | MATLAB (R2022B–R2024A) | Interactive, full graphical MATLAB desktop environment in your browser. |
| Remote Development | Minimal NB with SSH access | Connecting your local IDE (e.g., local VS Code or PyCharm) via SSH. |
| Code Editors in the Browser | Minimal NB (VSC), DataScience NB NRP | Browser-based VS Code environments. |
| CUDA Toolchains | CUDA (11.6–12.4), Alphapose, Google Colab | Specific CUDA runtimes and specialized GPU tooling. |
Image cards in the spawn form carry badges such as AI, SSH, VSC, GPU, or CPU, and each card shows the image release date — pick the most recent tag for a category.
Using a Custom Docker Image: You can supply your own public Docker image in the format
repo/imagename:tag(e.g., hosted on Docker Hub or the CERIT-SC Harbor registry). Always build on top of an existing Jupyter Docker Stack image to ensure all required JupyterHub startup scripts are present. For building images from scratch, see Custom Environments.
Configure Storage
- Default Persistent Storage (
/home/jovyan): Every notebook automatically mounts a persistent disk at/home/jovyan(or/home/rstudioin RStudio). Always save your scripts and results here so they persist when your server stops. You can also reuse and share this storage across different notebook instances. When creating a server you choose between a New home directory, reusing an Existing one, or Erase if home exists. - MetaCentrum Home (
/home/meta/<username>): You can mount one MetaCentrum storage home or project directory per notebook to access your existing grid files directly. - S3 Object Storage: You can mount S3-compatible object storage; it appears inside the notebook at
/storage/s3.
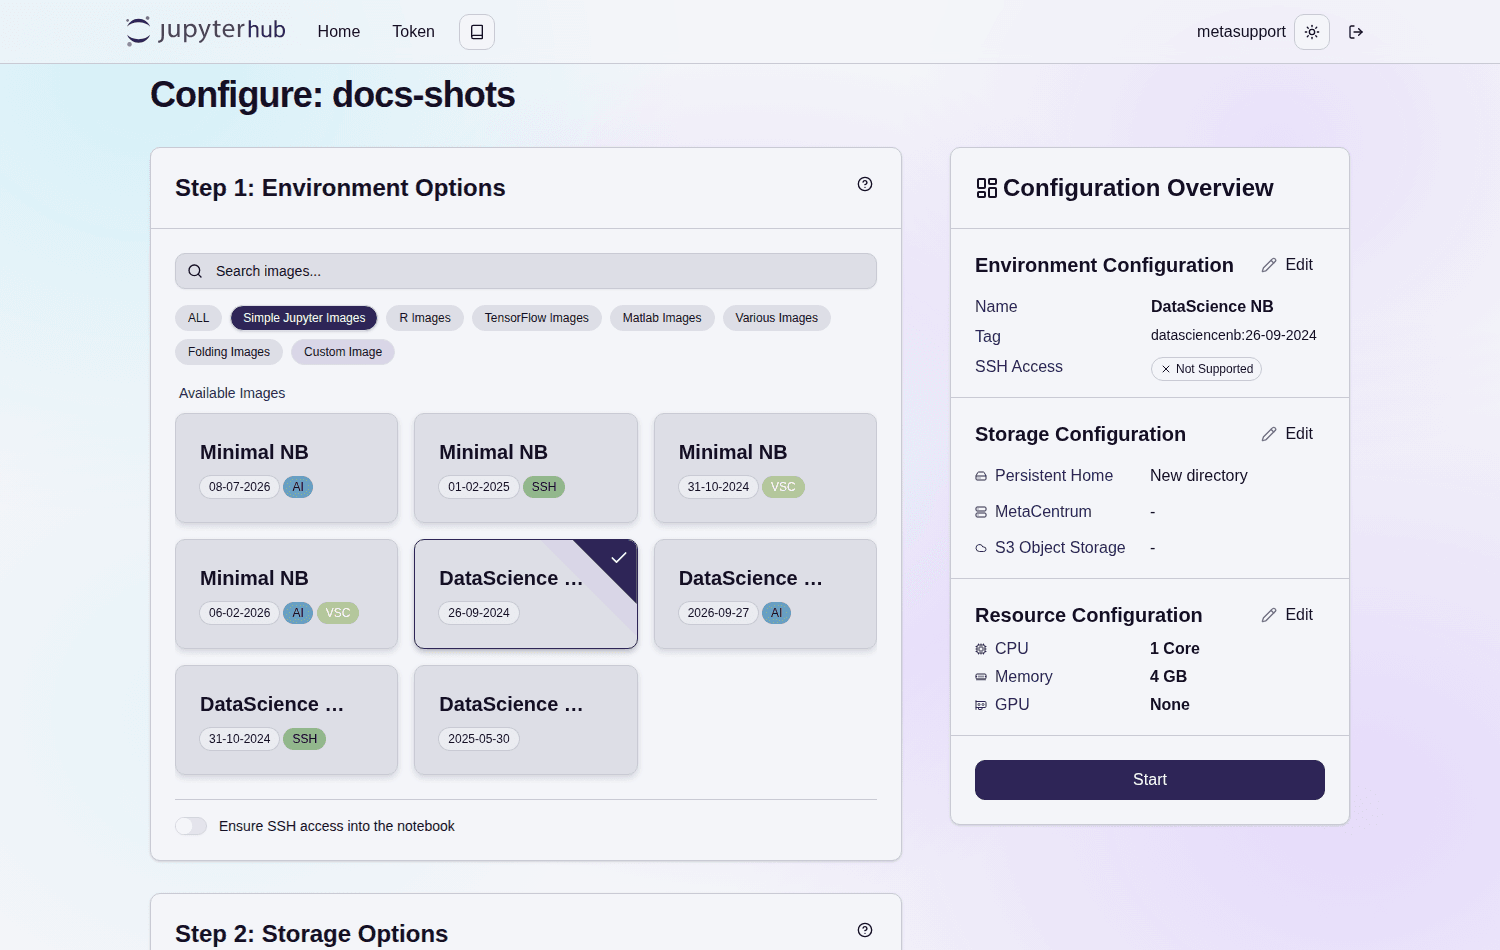
Prevent Spawn Failures: Only select a MetaCentrum storage location where you actually have an existing home directory. Selecting an uninitialized storage location will cause your server startup to fail. If you are not sure about home location, contact IT Service desk who will help.
Allocate Hardware Resources (CPU, RAM, GPU)
Request only what your current workflow requires:
- CPU (Guaranteed: 1 | Max: 96): Soft-handled. If your code exceeds your CPU limit, your notebook will not crash—the computation will simply be throttled (run slower).
- RAM / Memory (Guaranteed: 4 GB | Max: 1024 GB): Hard limit. Warning: If your code consumes more RAM than allocated, the kernel/process will be abruptly terminated (Out-Of-Memory error), though your notebook interface will stay open.
- GPU (Whole GPU or NVIDIA MIG Slices):
- Whole GPU: Only select a GPU if you are also selecting a GPU-enabled image (marked with
...with GPU...), which includes the necessary CUDA drivers. Depending on availability, dedicated whole GPUs include NVIDIA A10 (24 GB), A40 (48 GB), A100 (80 GB), H100 (80/94 GB), and RTX PRO 6000 Blackwell; the currently free capacity of each type is shown in the spawn form. - NVIDIA MIG (MultiInstance GPU): Ideal for smaller models or testing. You can request isolated hardware slices of an NVIDIA A100 (80 GB) card—up to 4 slices of
MIG (10GB)orMIG (20GB). Each slice acts as an independent GPU with dedicated memory. (Note: Using more than 1 MIG slice requires multi-GPU support in your code).
- Whole GPU: Only select a GPU if you are also selecting a GPU-enabled image (marked with
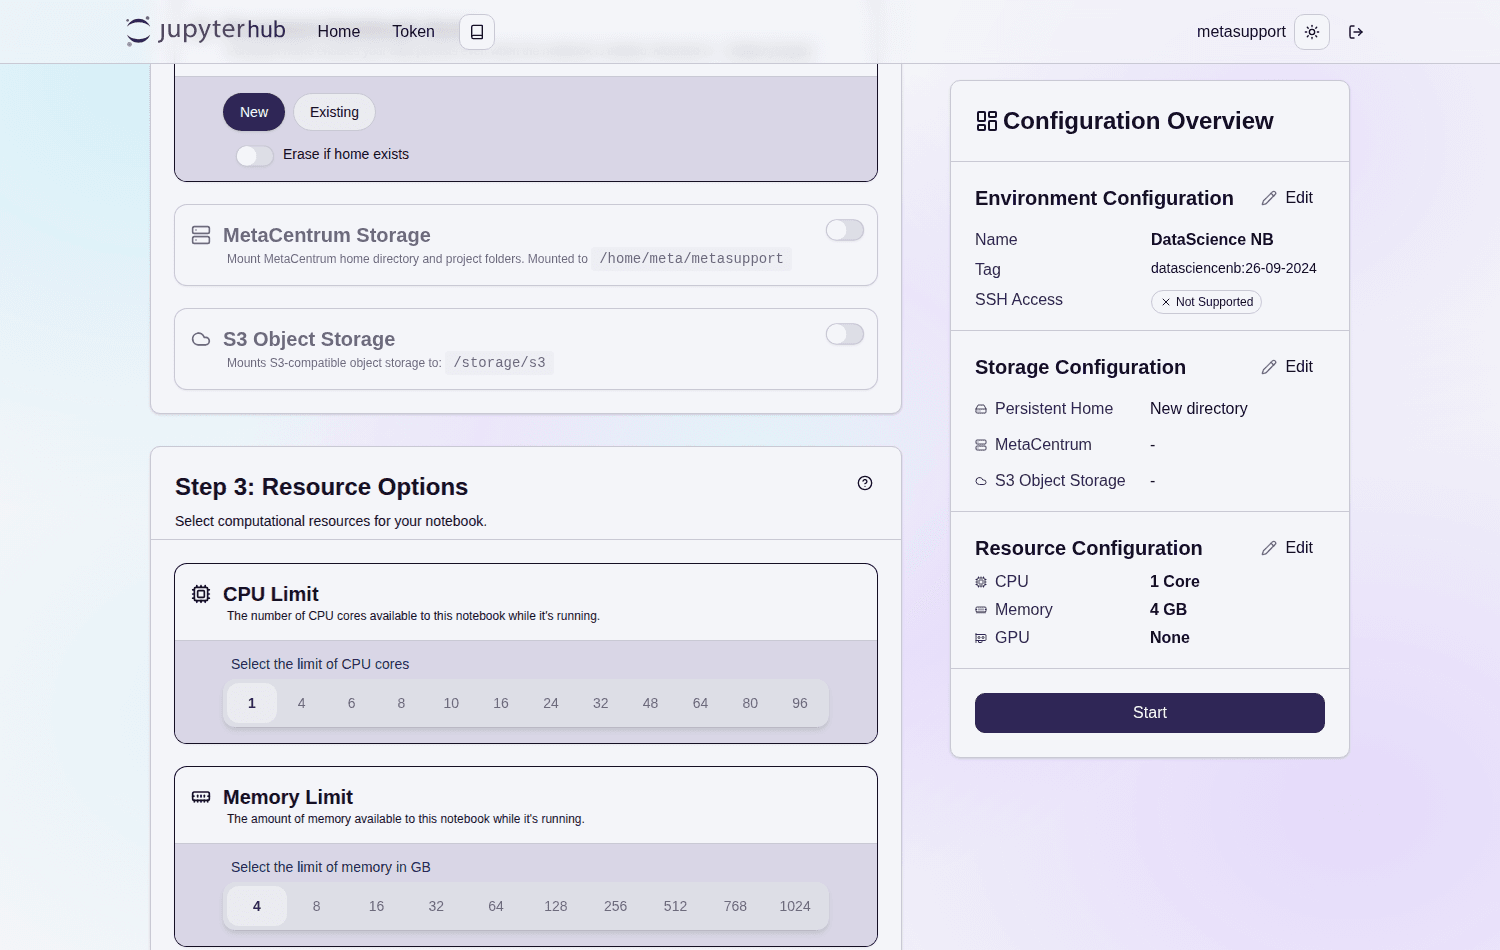
Once you have chosen image, storage, and resources, click Start and your server will spawn within roughly half a minute.
Last updated on