Documentation
SSH Access
You can connect to your notebook environment via SSH — for example, to use VS Code Remote-SSH or PyCharm from your laptop.
IPv6 Required: SSH access works only from IPv6-enabled networks. If you are on an IPv4-only home network, connect via eduVPN first.
Enabling SSH Access
- Spawn a server using the
Minimal NB with SSH accessimage, and switch on theEnsure SSH access into the notebooktoggle in the spawn form (Step 1: Environment Options).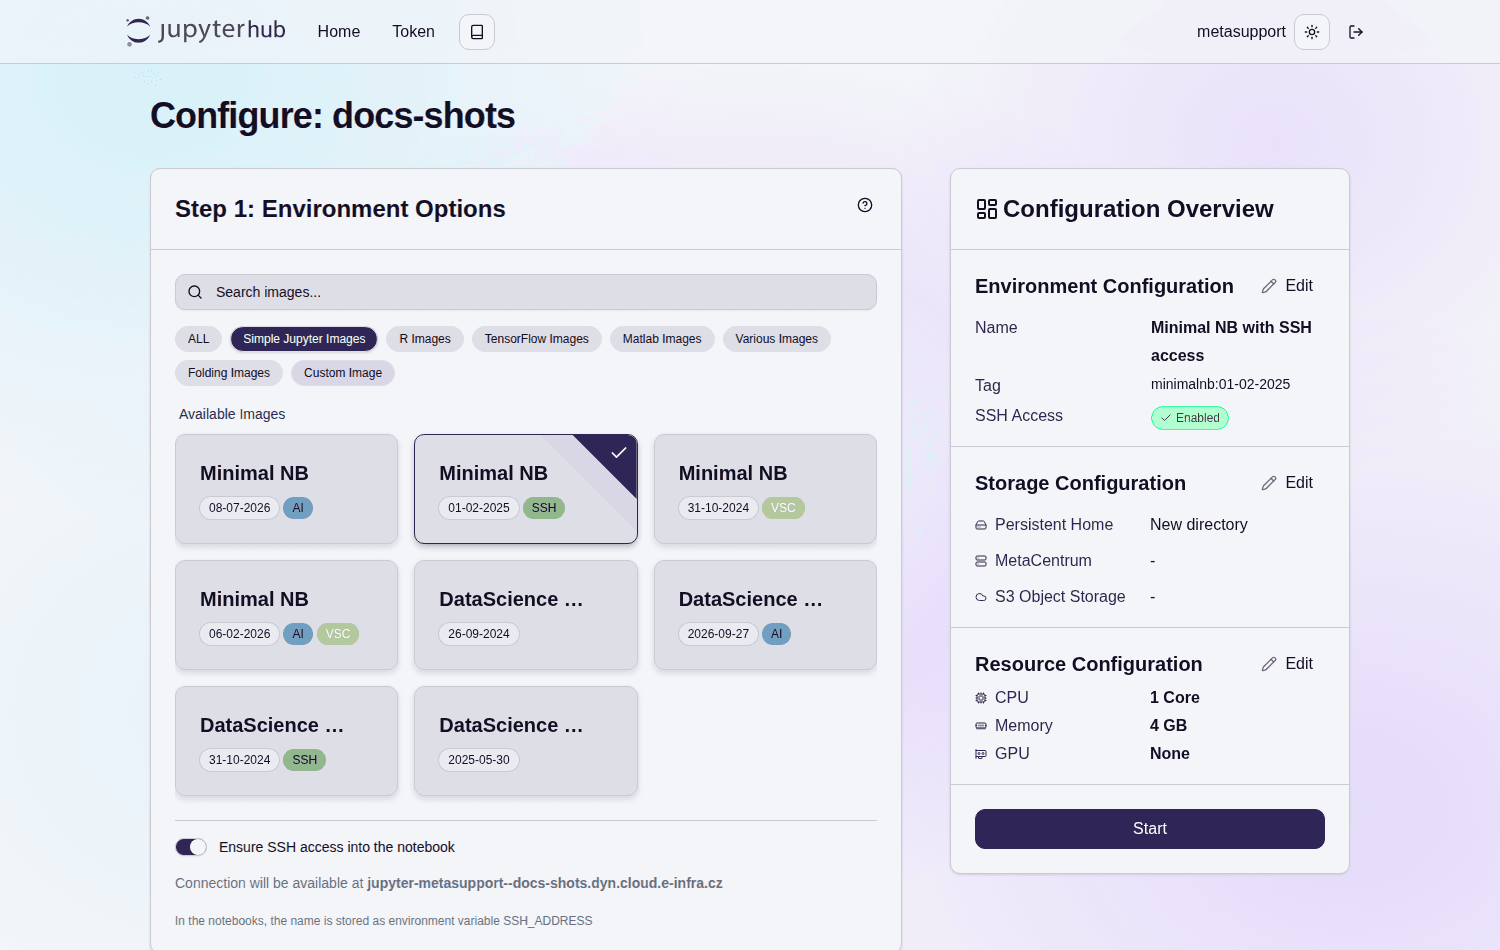
- Copy the SSH address shown during startup — it has the form
jovyan@jupyter-<username>--<server-name>.dyn.cloud.e-infra.cz(note the double dash between username and server name) — it will not be shown in the UI again. The address appears in the spawn progress page’sEvent log. (If you lose it, runkubectl get svc -n jupyterhub-[yourlogin]-prod-ns -o yaml | grep external-dns.alpha.kubernetes.io/hostnameinside the notebook, or reconstruct it from the pattern above).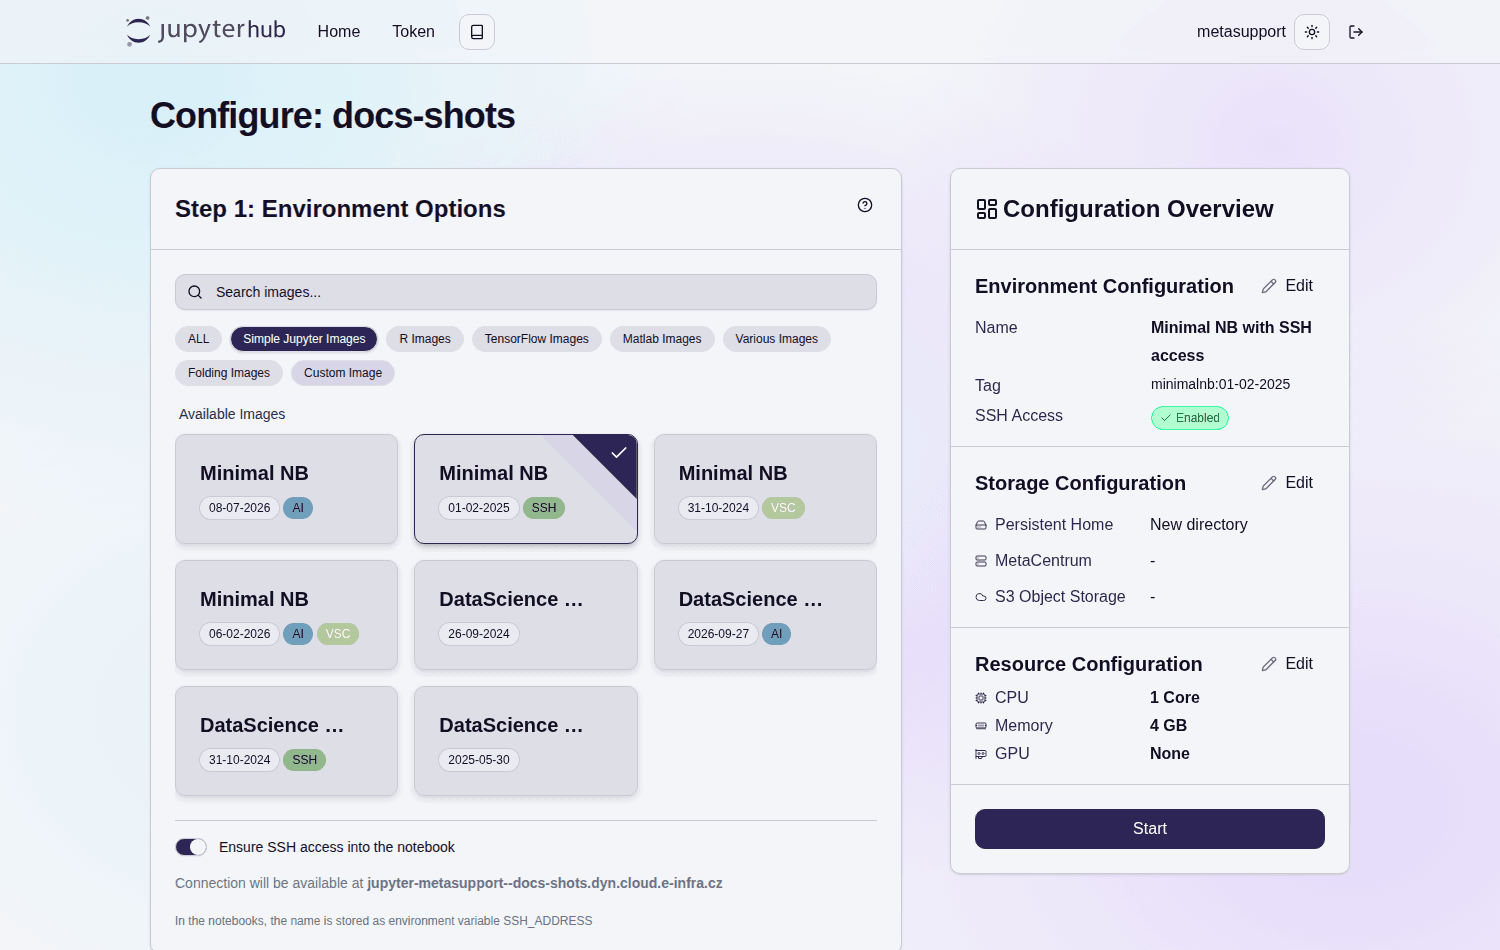
- Inside the JupyterLab terminal, add your laptop’s public SSH key to
/home/jovyan/.ssh/authorized_keys:mkdir -p ~/.ssh echo "ssh-rsa AAAA...your-public-key..." >> ~/.ssh/authorized_keys
If you don’t have an SSH key-pair generated on your laptop, you can create one with ssh-keygen -b 4096 -t rsa. The keys will be saved in [HOME]/.ssh/id_rsa (private part) and [HOME]/.ssh/id_rsa.pub (public part). Note that ls does not display dotfiles — use ls -a to see the .ssh directory.
-
Verify that the
sshddaemon is running usingps -fax— with the SSH-enabled image and the toggle switched on, it is started automatically and should appear in the process list similar to:PID TTY STAT TIME COMMAND 163 pts/1 Ss 0:00 /bin/sh 169 pts/1 R+ 0:00 \_ ps -fax 1 ? Ss 0:00 dumb-init start-notebook.sh --ServerApp.default_url=/lab --ServerApp.max_body_size=16291456000 7 ? Ssl 0:04 /opt/conda/bin/python3.11 /opt/conda/bin/jupyterhub-singleuser --ip=0.0.0.0 --ServerApp.default_url=/lab --ServerApp.max_body_size=16291456000 96 pts/0 Ss+ 0:00 \_ /usr/bin/sh -l 25 ? Ss 0:00 sshd: /usr/sbin/sshd [listener] 0 of 10-100 startupsIf you can’t see the
sshdprocess running (last line), start it manually with/usr/sbin/sshdin the JupyterLab terminal. You may get a warning about an OpenSSL version mismatch — this does not preventsshdfrom starting; verify withps -faxthat the process is running and everything is functional despite the warning. -
Connect from your laptop:
ssh jovyan@jupyter-metasupport--docs-verify.dyn.cloud.e-infra.cz(substitute your own username and server name — note the double dash between them).
SSH will sometimes print a warning about a changed host key (mainly after restarting the notebook) — this is expected, accept it and continue using the SSH key. DO NOT IGNORE THIS WARNING WHEN ENTERING A PASSWORD.
Building Your Own SSH-Enabled Image
See Custom Environments for the sshd configuration, host-key regeneration requirements, and the complete start-notebook.sh example.
Last updated on